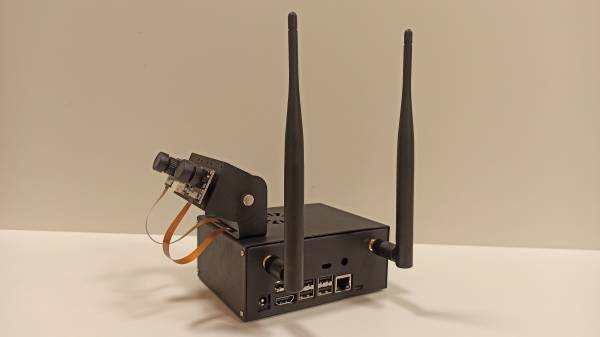
Jetson Xavier NX Case Assembly (with external antennas)
The metal case (C) by Waveshare (No. 17855) was made for a Jetson Nano but it can be perfectly used for a Xavier NX as they have the same dimensions. The official tutorial to assemble the case is useful, this tutorial explains how to assemble the kit using external antennas (which are not included in the kit).
The components required to assemble the case are as follows
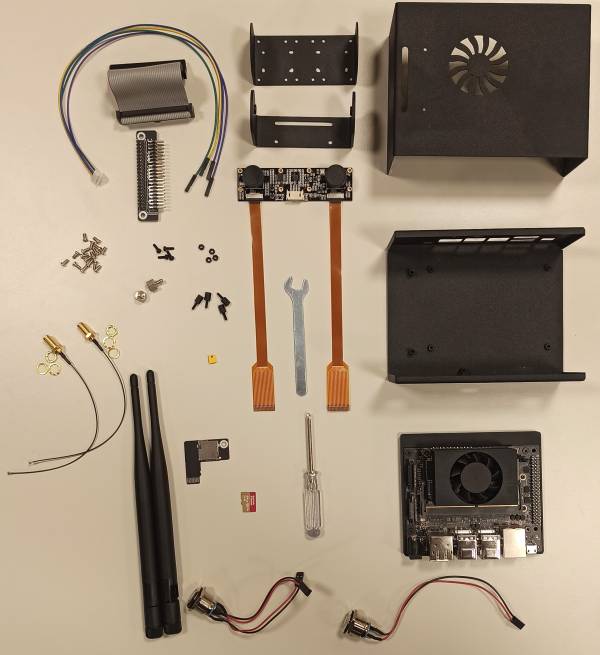
Before starting, clear and clean the work area to avoid anything going wrong during the assembly process.
<html> <p style=“color:red;”><b>IMPORTANT</b>: Handle the Xavier NX with care to avoid damaging any components, also avoid touching the board components with your hands or without an anti-static wrist strap as it is sensitive to static.</p> </html>
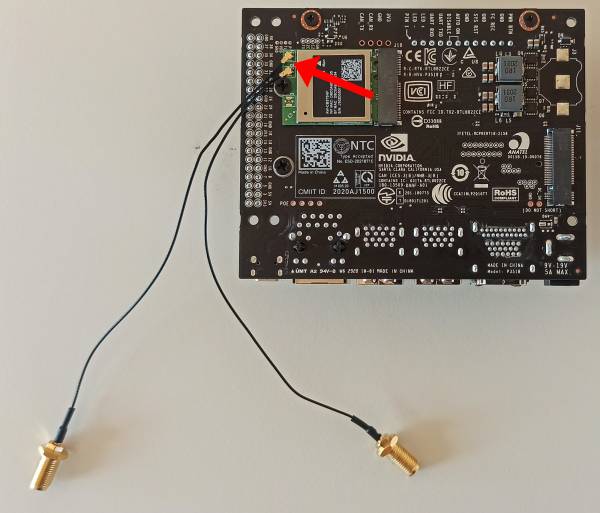
Step 1
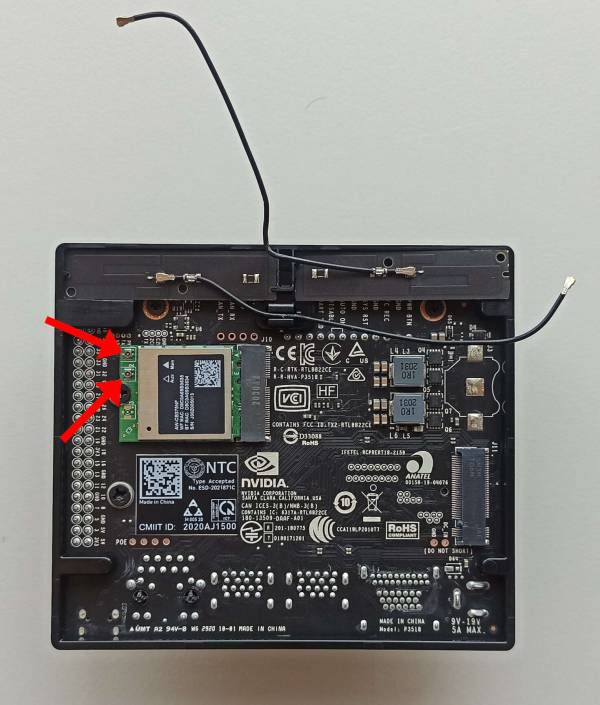
Disconnect the antennas from the wireless network card.
Step 2
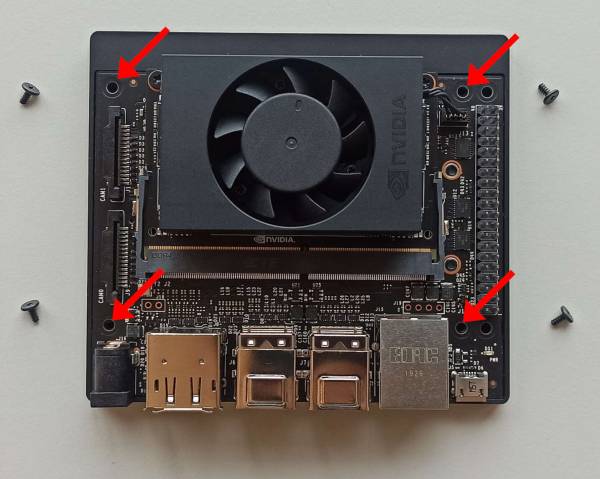
Remove the screws that hold the plate to the plastic base.
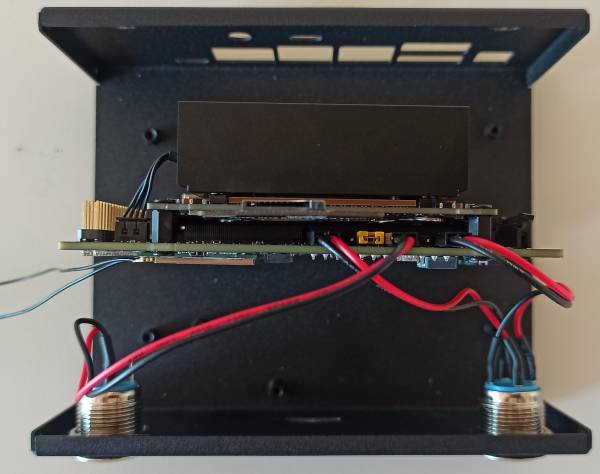
Step 3
Connect the antenna cables at the back, in the same position where the antennas were disconnected in step 1.
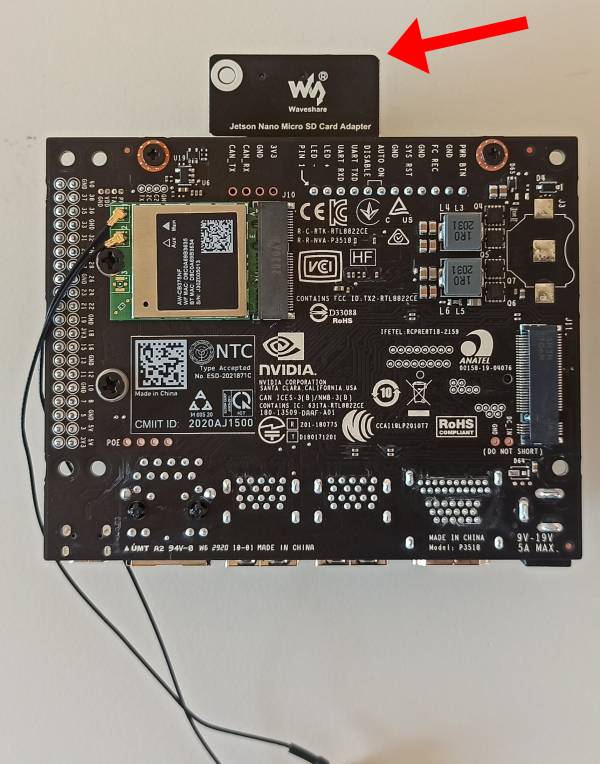
Step 4
Insert the micro-SD adapter in the micro-SD port of the Xavier NX.
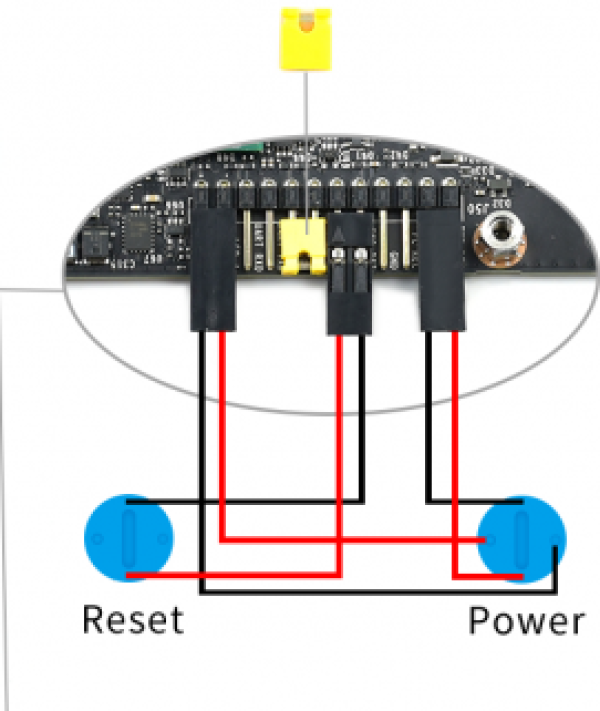
Step 7 Put the push buttons in place, the four-wire button goes in the POWER position and the two-wire button in the RESET position.
Step 8
Connect the button wires in the following position.
Step 9
Put the Xavier NX inside the metal case and fix it with the M2.5 screw.

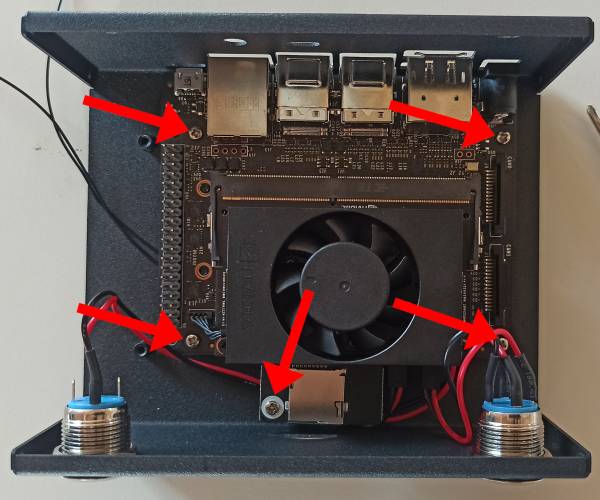
Step 10
Positioning the GPIO adapter.
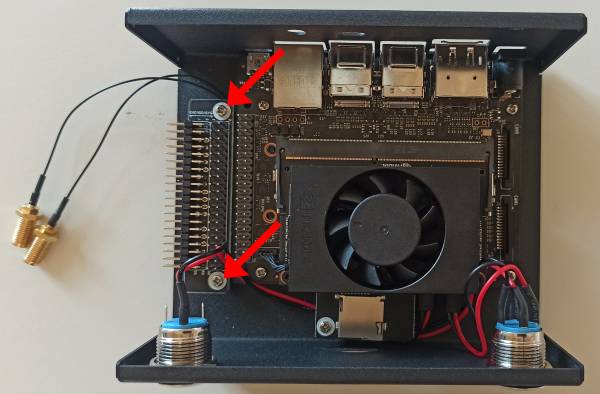
Step 11
Connect the flat cable between the GPIO adapter and the GPIO ports on the board.
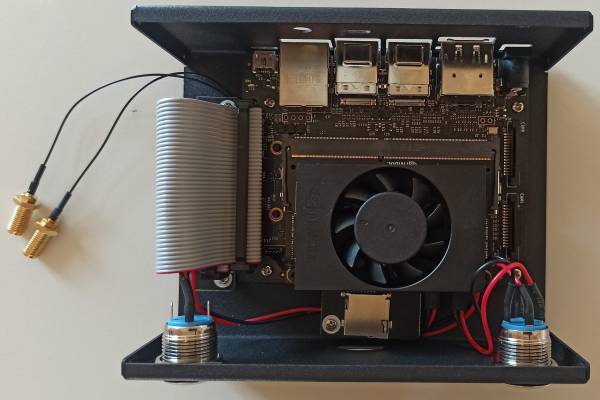
Step 12
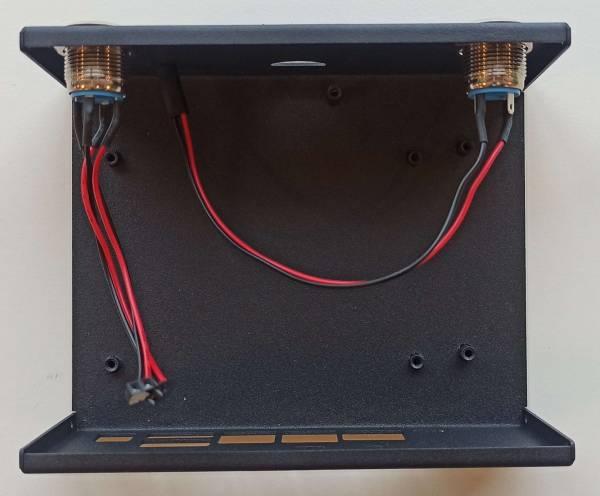
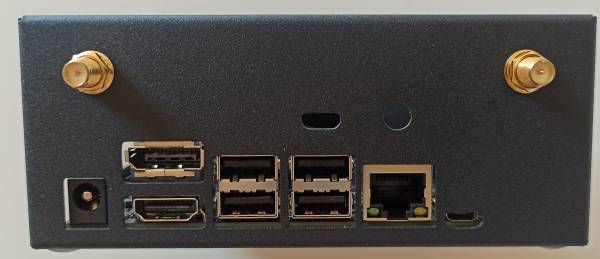
Put the antenna connectors in place.
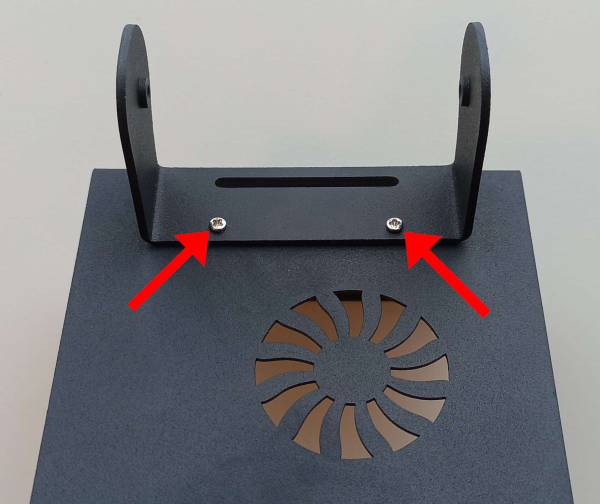
Step 13
Screw the camera holder bottom to the case.
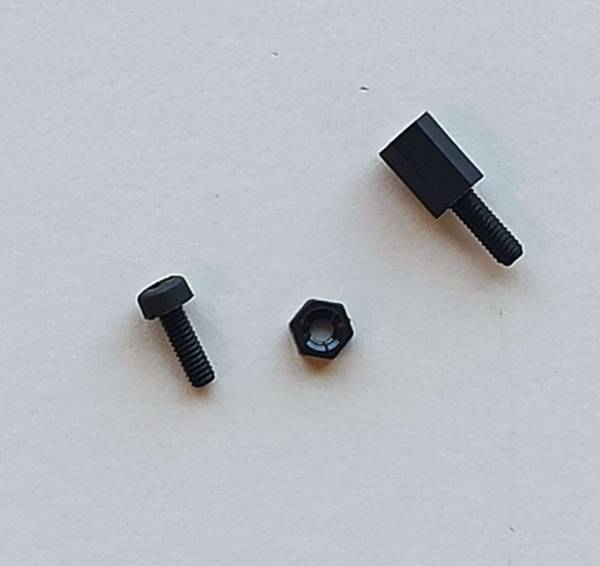
Step 14
To attach the camera you need 4x Screw M2x6+6, 4x screw M2x6 and 4x screw M2


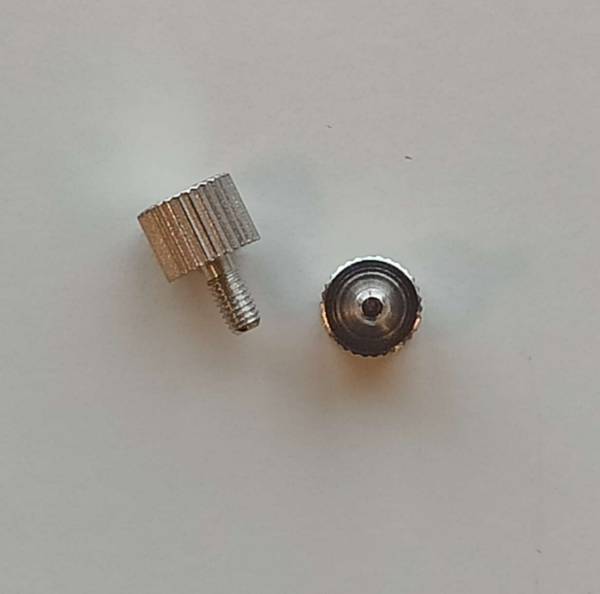
Step 15
Hold the camera with 2x screw M3x6
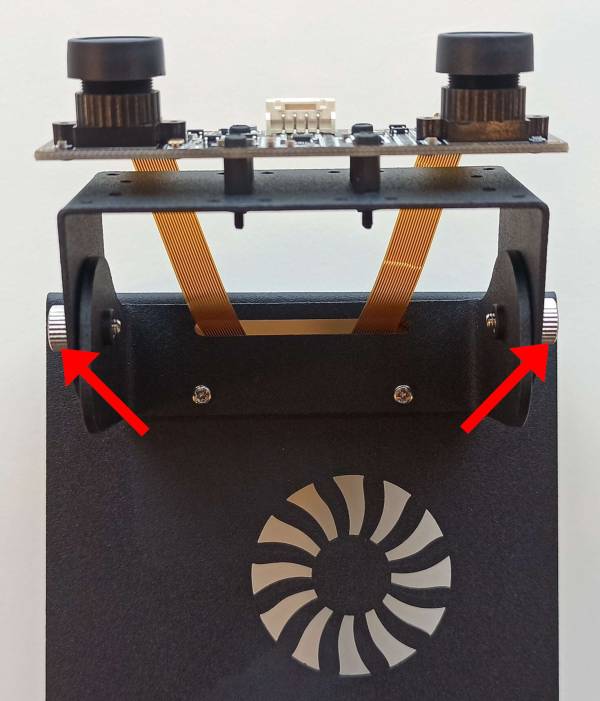
Step 16
Connect the FFC camera cables carefully with the Jetson board. Lift the FFC connector lock gently just about a millimeter. You will sense a resistance when the lock reaches the upper mechanical stop. Consider the right orientation of the cable and slide it firmly but carefully into the connector. Then move the connector lock fully down again.
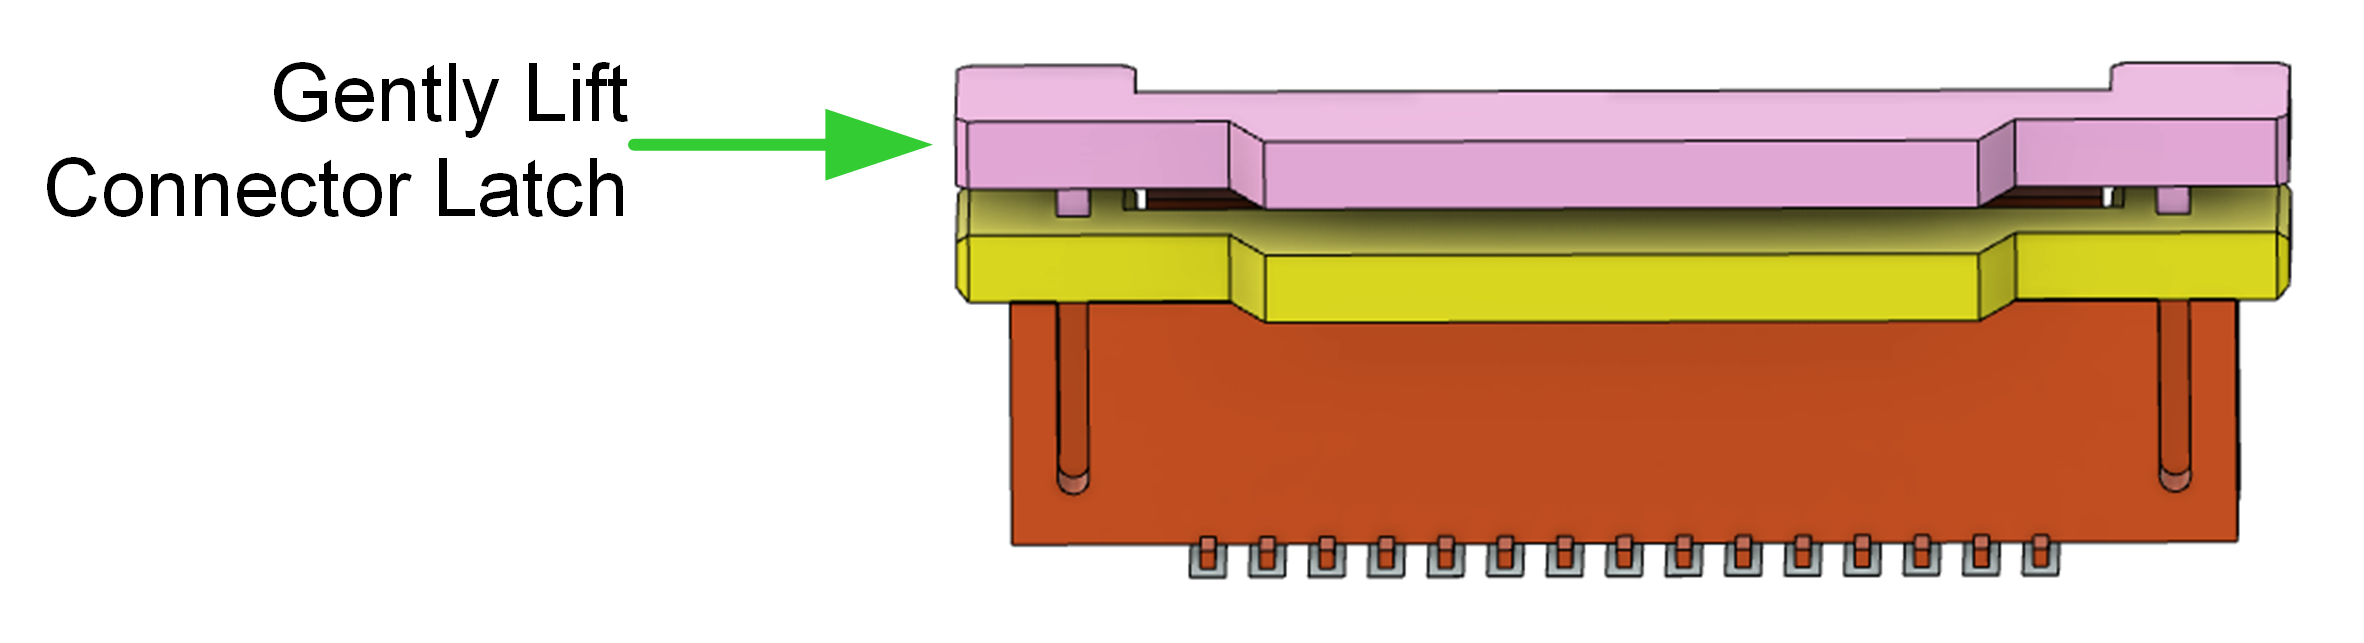
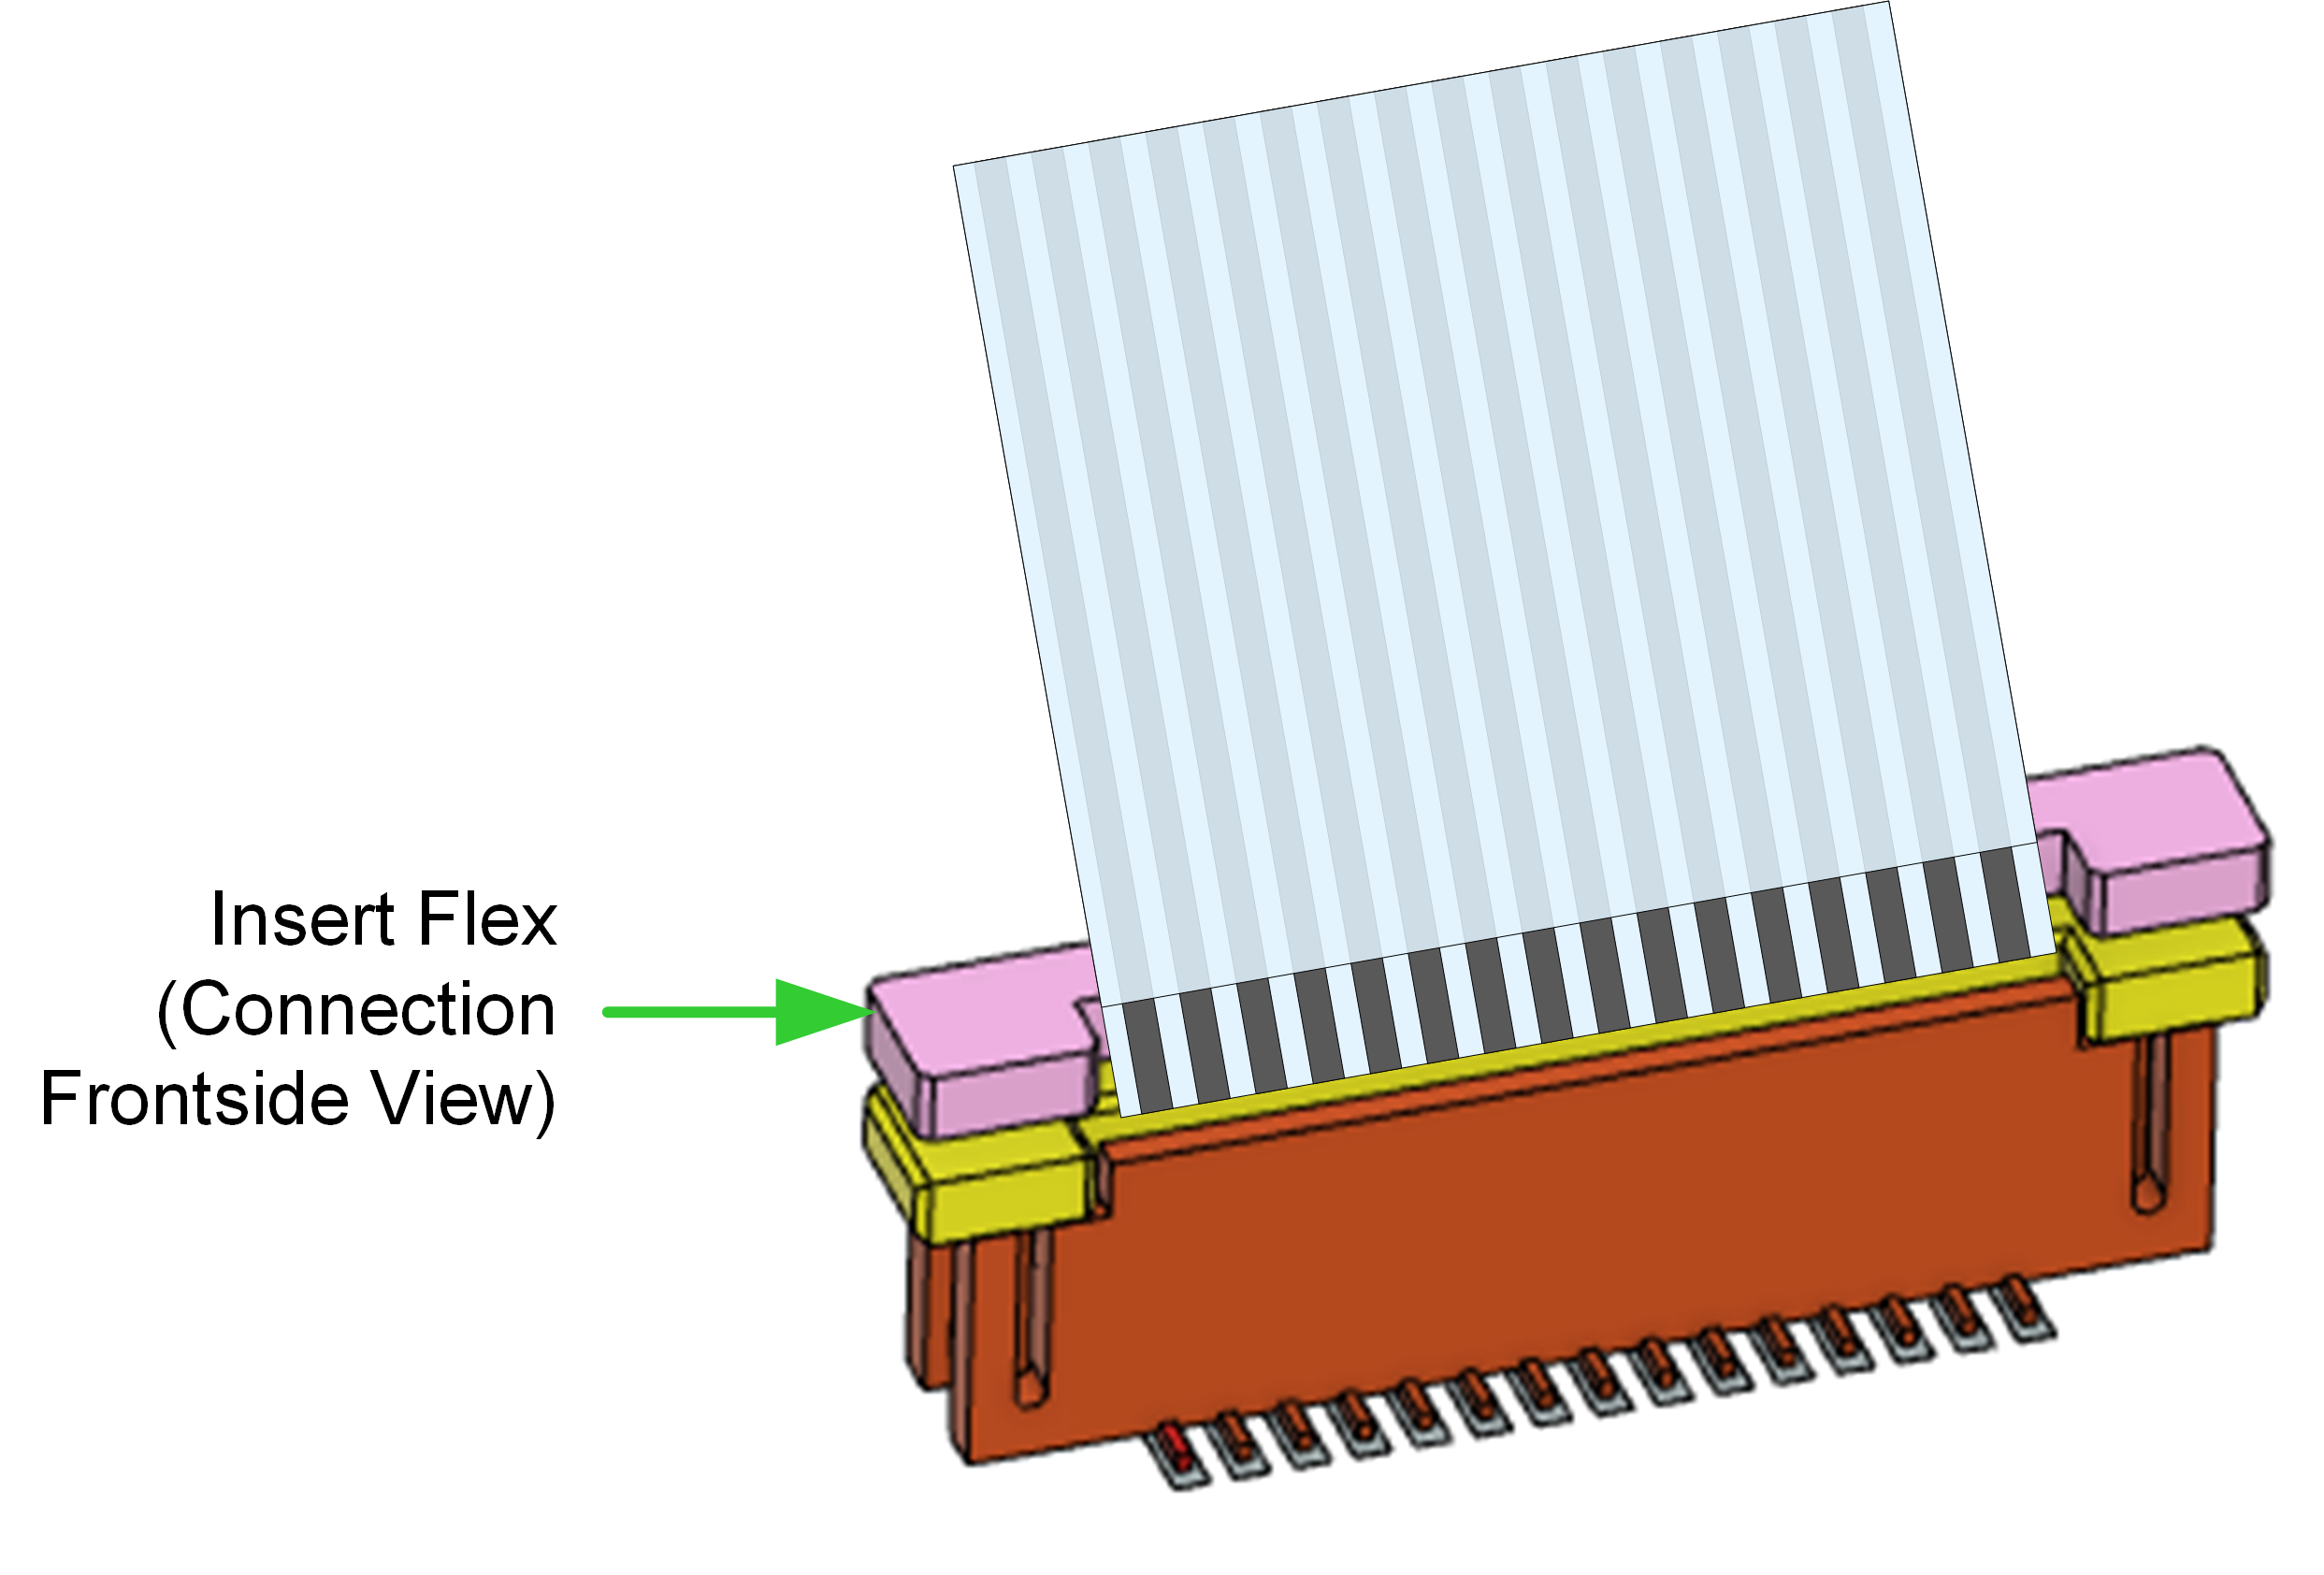
Source: Jetson Nano 2GB Developer Kit User Guide
Step 17
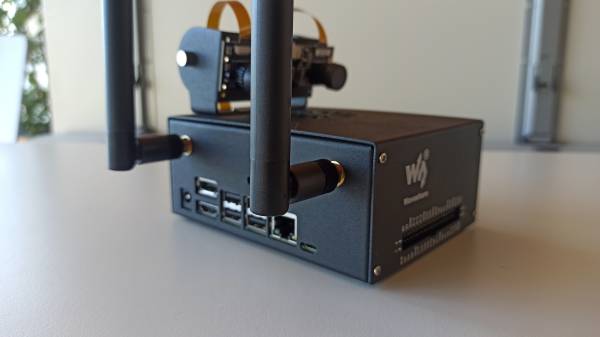
Screw the antennas into the connectors.
Step 18
Insert the micro SD card until you hear a click.

Step 19
Enjoy your new mini-supercomputer for AI