
Table of Contents
VNC Configuration
VNC stands for Virtual Network Computing, it is a graphical desktop sharing system that uses the Remote Frame Buffer (RFB) protocol which allows you to control a remote computer through a network connection, capturing keyboard and mouse events and updating the graphical window on both computers by retransmitting the changes through a network.
Hardware Setup
")
Be sure to connect the following peripherals:
- Mouse
- Keyboard
- Screen (using an HDMI cable)
- Power Plug (of course)
Turn on the Jetson Xavier NX by pressing the POWER button.
Depending on the configuration at the time of installing the operating system, a login screen will appear, or it will automatically log in and skip this.
Once the operating system is ready open the terminal by pressing the key combination Ctrl + Alt + T, or use the applications menu and search for Terminal.
Installing the VNC Server
Make sure all packages are up to date by running the command
sudo apt-get update
Install Vino which is the VNC server for the GNOME desktop environment.
sudo apt-get install vino
Enabling the VNC Server
Now it is necessary to enable the automatic start of VNC Server each time you log in to the operating system, to do this run the command
mkdir -p ~/.config/autostart && cp /usr/share/applications/vino-server.desktop ~/.config/autostart
Configure the VNC server
gsettings set org.gnome.Vino prompt-enabled false && gsettings set org.gnome.Vino require-encryption false && gsettings set org.gnome.Vino authentication-methods "['vnc']"
In the following command replace yourpassword with your desired password.
Note this will be the password needed to remotely connect to the VNC Server and does not necessarily have to be the same as yourrootuser.
gsettings set org.gnome.Vino vnc-password $(echo -n 'yourpassword'|base64)
Setup the Desktop Resolution
The desktop resolution is determined depending on the capabilities of the display connected to the Jetson, but if there is no display connected the default resolution is 640×480, which is not very comfortable for remote working. This default resolution can be changed by editing the xorg.conf file, to open it type the following command in the terminal.
sudo gedit /etc/X11/xorg.conf
It will ask you for the user's password and then display the information contained in the file xorg.conf, at the end of the file add the following lines:
Section "Screen"
   Identifier    "Default Screen"
   Monitor       "Configured Monitor"
   Device        "Tegra0"
   SubSection "Display"
       Depth    24
       Virtual 1280 800 # Modify the resolution by editing these values
   EndSubSection
EndSection
You can adjust the resolution to your needs by changing the values in the SubSection “Display” in the parameter Virtual.
Note: Do not change the format of the values, do not write things like1280×800,1280px 800pxor any other combination and keep in mind that the first value is the width and the second is the height.
Do not forget to save the changes to the file!.
Preparing to connect the VNC Server
(Remains in the Jetson desktop environment)
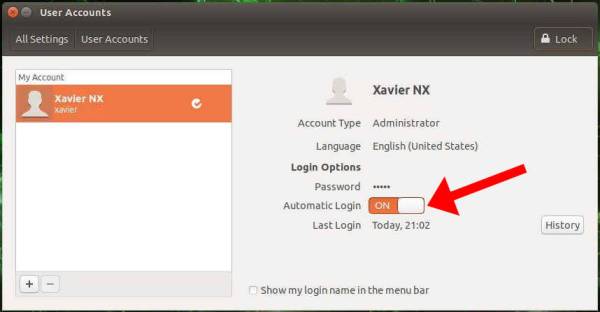
Make sure you have automatic login enabled so that the VNC Server can start automatically.
If this is not the case, you can activate it this way:
In the upper right part of the screen click on the icon shown in the image.
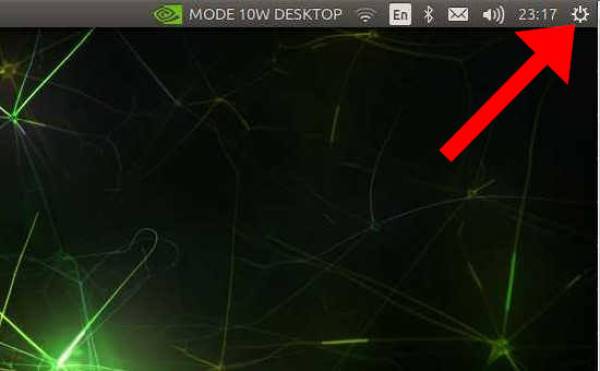
Open the system settings.
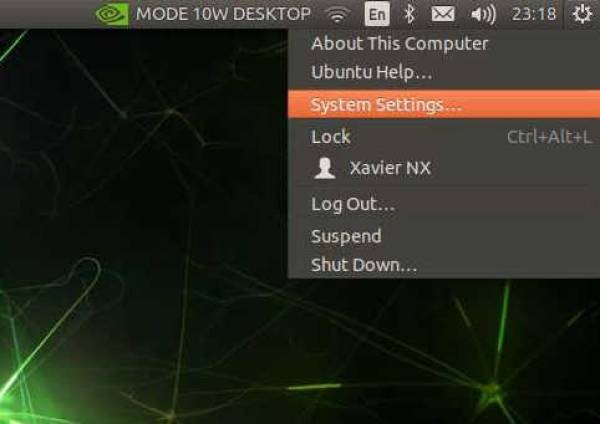
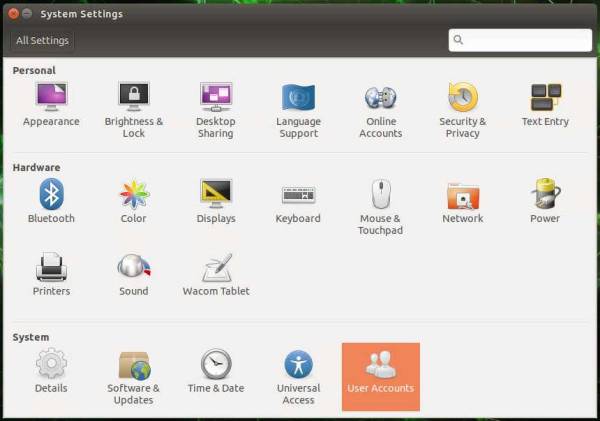
User Accounts
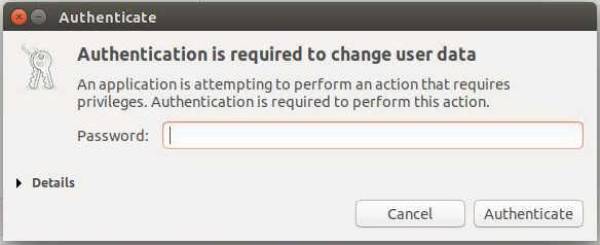
Unlock the change of settings by pressing the Unlock button.
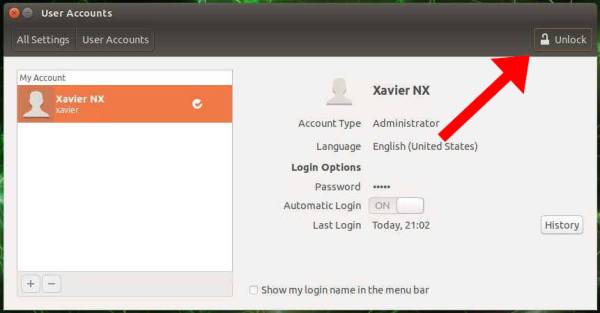
Authenticate with your password
Enable the Automatic Login option.
Finally you need the IP address of the system to know it, type in the terminal.
ifconfig
If you will use the remote connection via wifi look for the wlan0 section and the sequence of numbers after the text inet, for example inet 192.168.56.98. In case of using it by ethernet look for the eth0 section, or by usb usb0.
This IP address and the previously configured password will be the necessary data to perform the remote connection.
To complete the process, restart Jetson by typing in the terminal.
sudo reboot
Now your Jetson is ready to connect to the desktop remotely!
Remote Connection
To connect remotely you can use any VNC Client of your choice. Some examples are
The VNC Client will ask for the IP and password and if everything is correct it will successfully connect to our Jetson.
IMPORTANT NOTE: Make sure that the Jetson and the remote computer are connected to the same network, otherwise it will not work.